
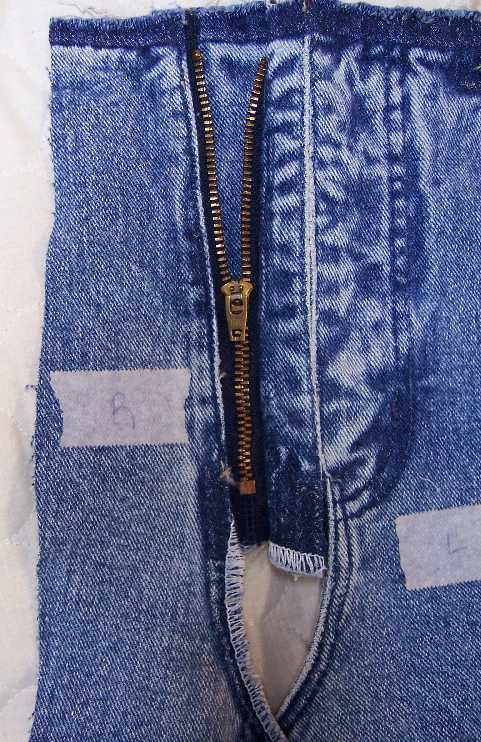
I have no intention of sewing my own jeans but I'd like to duplicate the fit. I sacrificed this old pair of thrift store jeans for the tutorial and this technique seems to be "the method" on most dress pants as well. The jeans open on the right and while most women's dress pants open on the left, I'm right handed so I'm sticking with the right opening as shown here. Rather than cut new pieces I'll take this zipper apart and sew it back together.
These old school jeans actually have a waist so if you're making low rise pants your templates would probably be closer to 4" instead of 8" shown here. I've also seen facings that are narrower, about 1 -1/2" wide. You can still use a 7" zipper, leaving the excess at the top edge. Also, you could omit the left facing and make it an extension on the pants pattern. This is the norm in home sewing patterns. I think it's easier 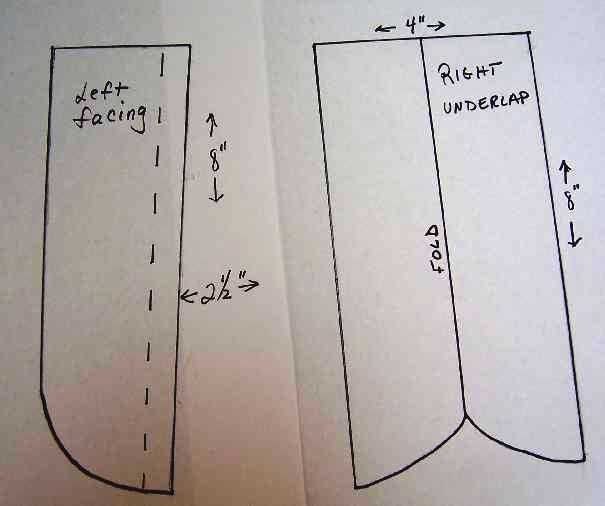 to cut and sew a small unit and seam it using the mark on my machine's needleplate rather than having to mark a line on the extension to key the zipper.
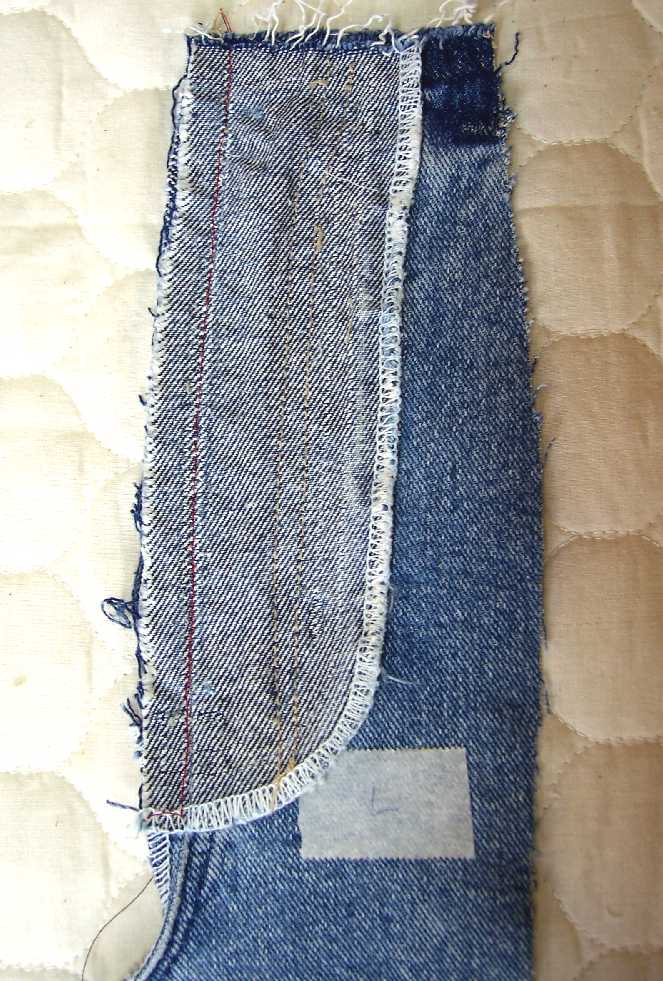
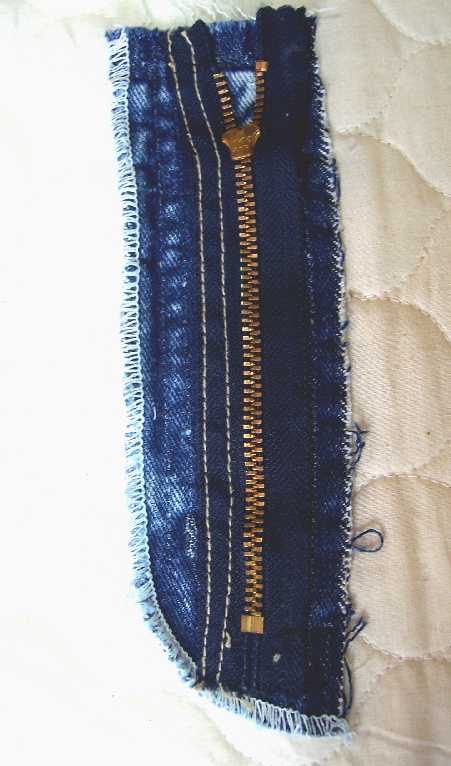
Here's the parts with the zipper already sewn to the left facing. Note the edge on the right pants piece has been serged all the way and the left piece only partially serged. The right underlap has been folded wrong sides together and serged and the left facing serged only on the curved side. These pieces are NOT interfaced and most of my trousers aren't either. The few that do, have light interfacing, barely there. The seam allowance is 1/2".


The zipper is placed face down on the left facing. The right edge of the tape is 1/2" from the raw edge and the tape is secured on the left side of the teeth with 2 rows of stitching. 2 rows seem to be standard even in dress pants.
With right sides together sew the left facing to the left front in a 1/2" seam. Be sure and keep the tape free so it doesn't get caught in the seam.
 Front View
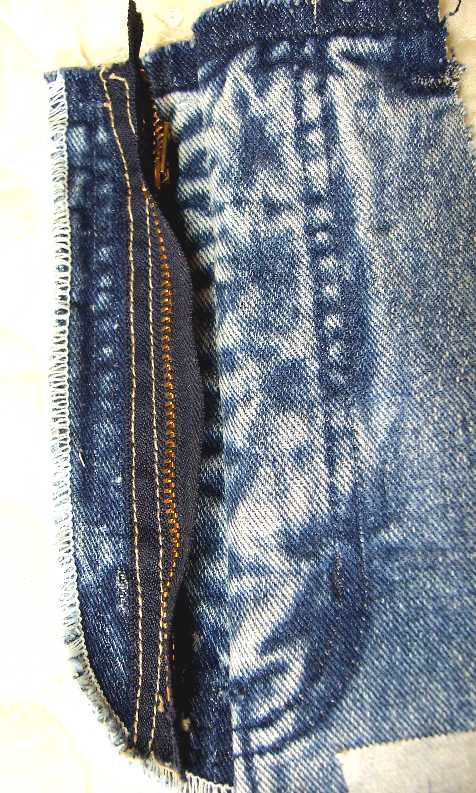
Turn the facing to the back so the zipper is right side up. Align the edge of the zipper tape with the serged edge of the right underlap, right side to wrong side of zipper. Just move it over and set it on top!
Fold the edge under 3/8" on the right front pants piece and place it on the zipper close to the teeth and topstitch. You'll be stitching through 3 layers.....the underlap, the zipper and the pants.
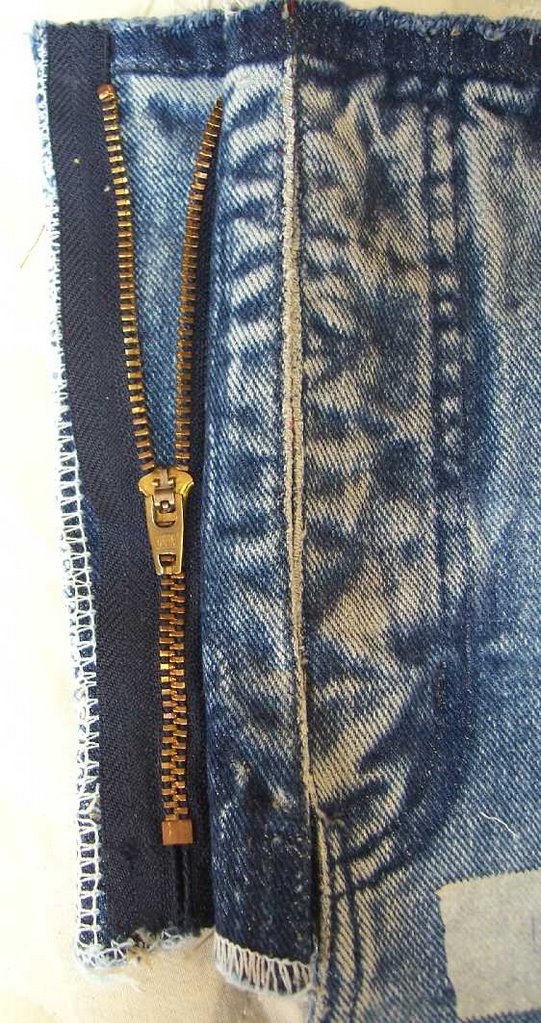
Here's a closer view of the topstitching that secures the zipper on the right side. When the last inch is sewn it will match perfectly as the top edge was used in the alignment.

Sew the crotch seam ending about 1/2" past where the fly begins. The raw edge part of the seam will be hidden after you topstitch.


Now the topstitching and you're done! Be sure and keep the underlap free. There's a seam at the front edge and if you wanted that topstitiched it needed to be done before you sewed the crotch seam. Make a template from some sticky paper like freezer paper that can be ironed on temporarily or from painter's wide masking tape. Also, bartack the underlap and the facing together near the bottom edge of the fly.


4 comments:
Wow. This is probably the best fly front tutorial I've seen on the web. Thank you very much!
I loved how clear and easy these instructions are. And, it is a nice, well hidden zipper!
I loved how clear and easy these instructions are. And, it is a nice, well hidden zipper!
I just found this post -- five years after the fact! Pants Fly Demystified! You are my new hero!!
Post a Comment